With the progress of technology and the increasing demands of users on the shooting performance of Android mobile phones, more and more handset makers like Samsung, Huawei, HTC, LG, OPPO, ViVo, OnePlus and so on are scrambling to launch new phones which with powerful shooting performance. So, lots of people would like to use their Android phone to take photos, which is more convenient than carrying around another camera.
However, with the increasing number of photos, not only does it occupy more cell phone storage space, reduces the operation speed of mobile phones, but also increases the risk of image loss. So, it's necessary to back up your phone pictures regularly, but how to transfer photos from various Android phones to computer as a backup? And how will you import them to your phone? However, have you ever encounter any difficulties?
Now, this article can solve your problem. Here I will impart you three different yet effective ways to transfer your photos from Android phone to computer with ease.
Three Ways to Transfer Photos from Android Phone to Your Computer
Part 1 Transfer Photos from Android Phone to Computer with Mobile Transfer
Mobile Transfer is an excellent data processing software. It can transfer the mobile phone data between different mobile phones, but also the transfer of mobile phone data to the computer. A wide range of data transfer, including photos, text messages, contacts, videos, music, calendar, Apps, etc.. The transfer process is also very simple, especially the transfer to the computer, which is equivalent to the backup data to the computer.


Step 1. Download, install and run Mobile Transfer on your PC. After the normal operation of the program, you can find that there are four models for you to choose, click "Back Up Your Phone".

Note: If you want to customize the location of the backup folder, just click on the menu at the top right of the window, and then select "settings". Click "Browse" to choose folder and then click "OK".


Step 2. Connect your Android Phone to your computer by using a USB cables. Ensure that Mobile Transfer can recognize your phone.

Step 3. After the program detects your cell phone, it will show some contents which you can backup in the middle. Please check "Photos". Then, click "Start Transfer" to begin the backup process. Keep the phone connected through the entire process.

Part 2 Transfer Photos from Android Phone to Computer with Dr.fone-Android Toolkit (Transfer)
In addition to use the Mobile Transfer, Dr.fone-Android Toolkit also your best choice to transfer photos from Android phone to computer. Dr.fone-Android Toolkit is a famous mobile phone management tool for Android phone and tablet. With the help of this program, you can not only transfer/backup/recover/erase your Android phone data, but also unlock the lock screen on Android phone, root/unroot your Android devices. The following method we'll show you how to use this software to transfer your photos from Android phone to computer with a click.
Step 1. Launch Dr.fone-Android Toolkit and connect your Android phone or tablet to PC. When you can see the primary interface, choose "Transfer" to go on.

Your Android device will be recognized and displayed in the primary window. Then Select the "Photos" tab located on the top menu.
Step 2. Take a moment to browse through your albums and select the photos which you want to have transferred. You can also export an entire album if you'd like to.
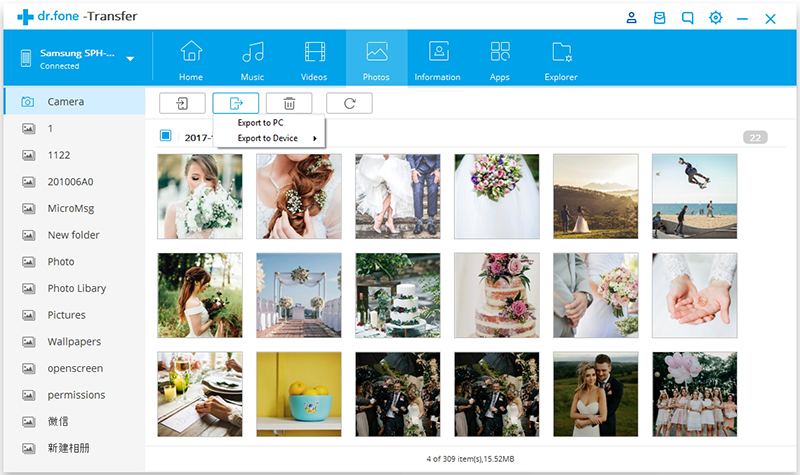
After you have them selected, click on the export icon followed by "Export to PC".
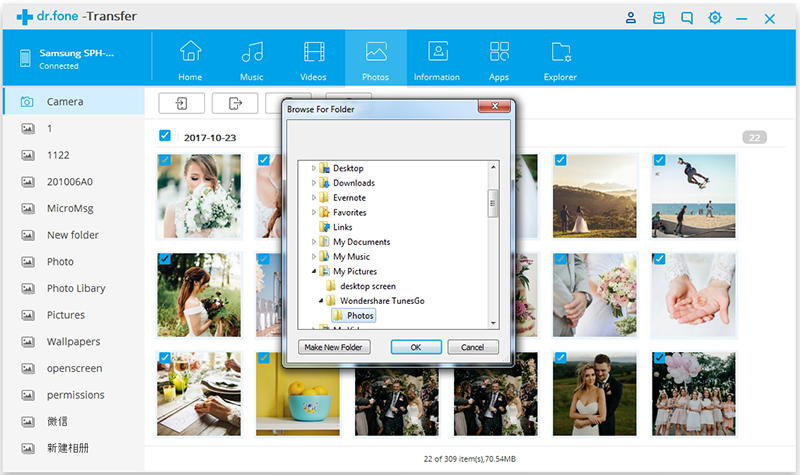
Step 3. Select a location to have the photos exported and saved to, click on "OK", and the photos will be exported within seconds.
Part 3 Transfer Photos from Android Phone to Computer with Android Data Recovery
The third way is using Android Data Recovery, don't think you will use this software only when you're restoring lost data, since this Android data recovery program can scan and restore the lost and existing data including contacts, text messages, photos, videos, call history, WhatsApp messages, audio and more from any of your Android device, so, you can use it to transfer photos from your Android phone to computer selectively.
Step 1. Connect Your Android Phone
Run Dr.fone-Android Toolkit on your PC, and select "Recover" pane. Then Connect your Android phone to the computer using a USB cable. Once your device is detected, you can find the screen as follows.

Step 2. Select file types to scan
After managing to concatenate your device to the computer, the program will display all the file types it supports to recover. Generally speaking, it has checked all the file types, thus, data both delected and subsistent on your device are displayed in categories. You can just select the type that you have an inclination to recover, to backup your photos, here you can just check "Gallery".

Note: If your phone is not rooted, the program will provide two options: scanning deleted files and scanning all files. Scanning all files takes longer, but scans files more thoroughly.

Step 3. Preview and save the photos on your PC
The scan only takes a short time, and after the scan, you can preview each item. Choose what you want and click "Recover" to save them all on your computer.

Transfer Photos from Samsung S8/S8+ to PCTransfer Photos from Samsung Note 8 to PC